Configuring Users and Roles
Once WSO2 Identity Server and the DPDP Accelerator are started, the accelerator automatically provisions three predefined roles: dpdp-consent-admin, dpdp-consent-dpo, and dpdp-consent-user.
This guide walks you through:
1. Creating a User
Follow these steps to create a user in the Identity Server Console.
Step 1: Sign in to the Console
Open your browser and navigate to the WSO2 Identity Server Console:
https://<host>:9443/console
Log in with your administrator account (e.g., admin@wso2.com).
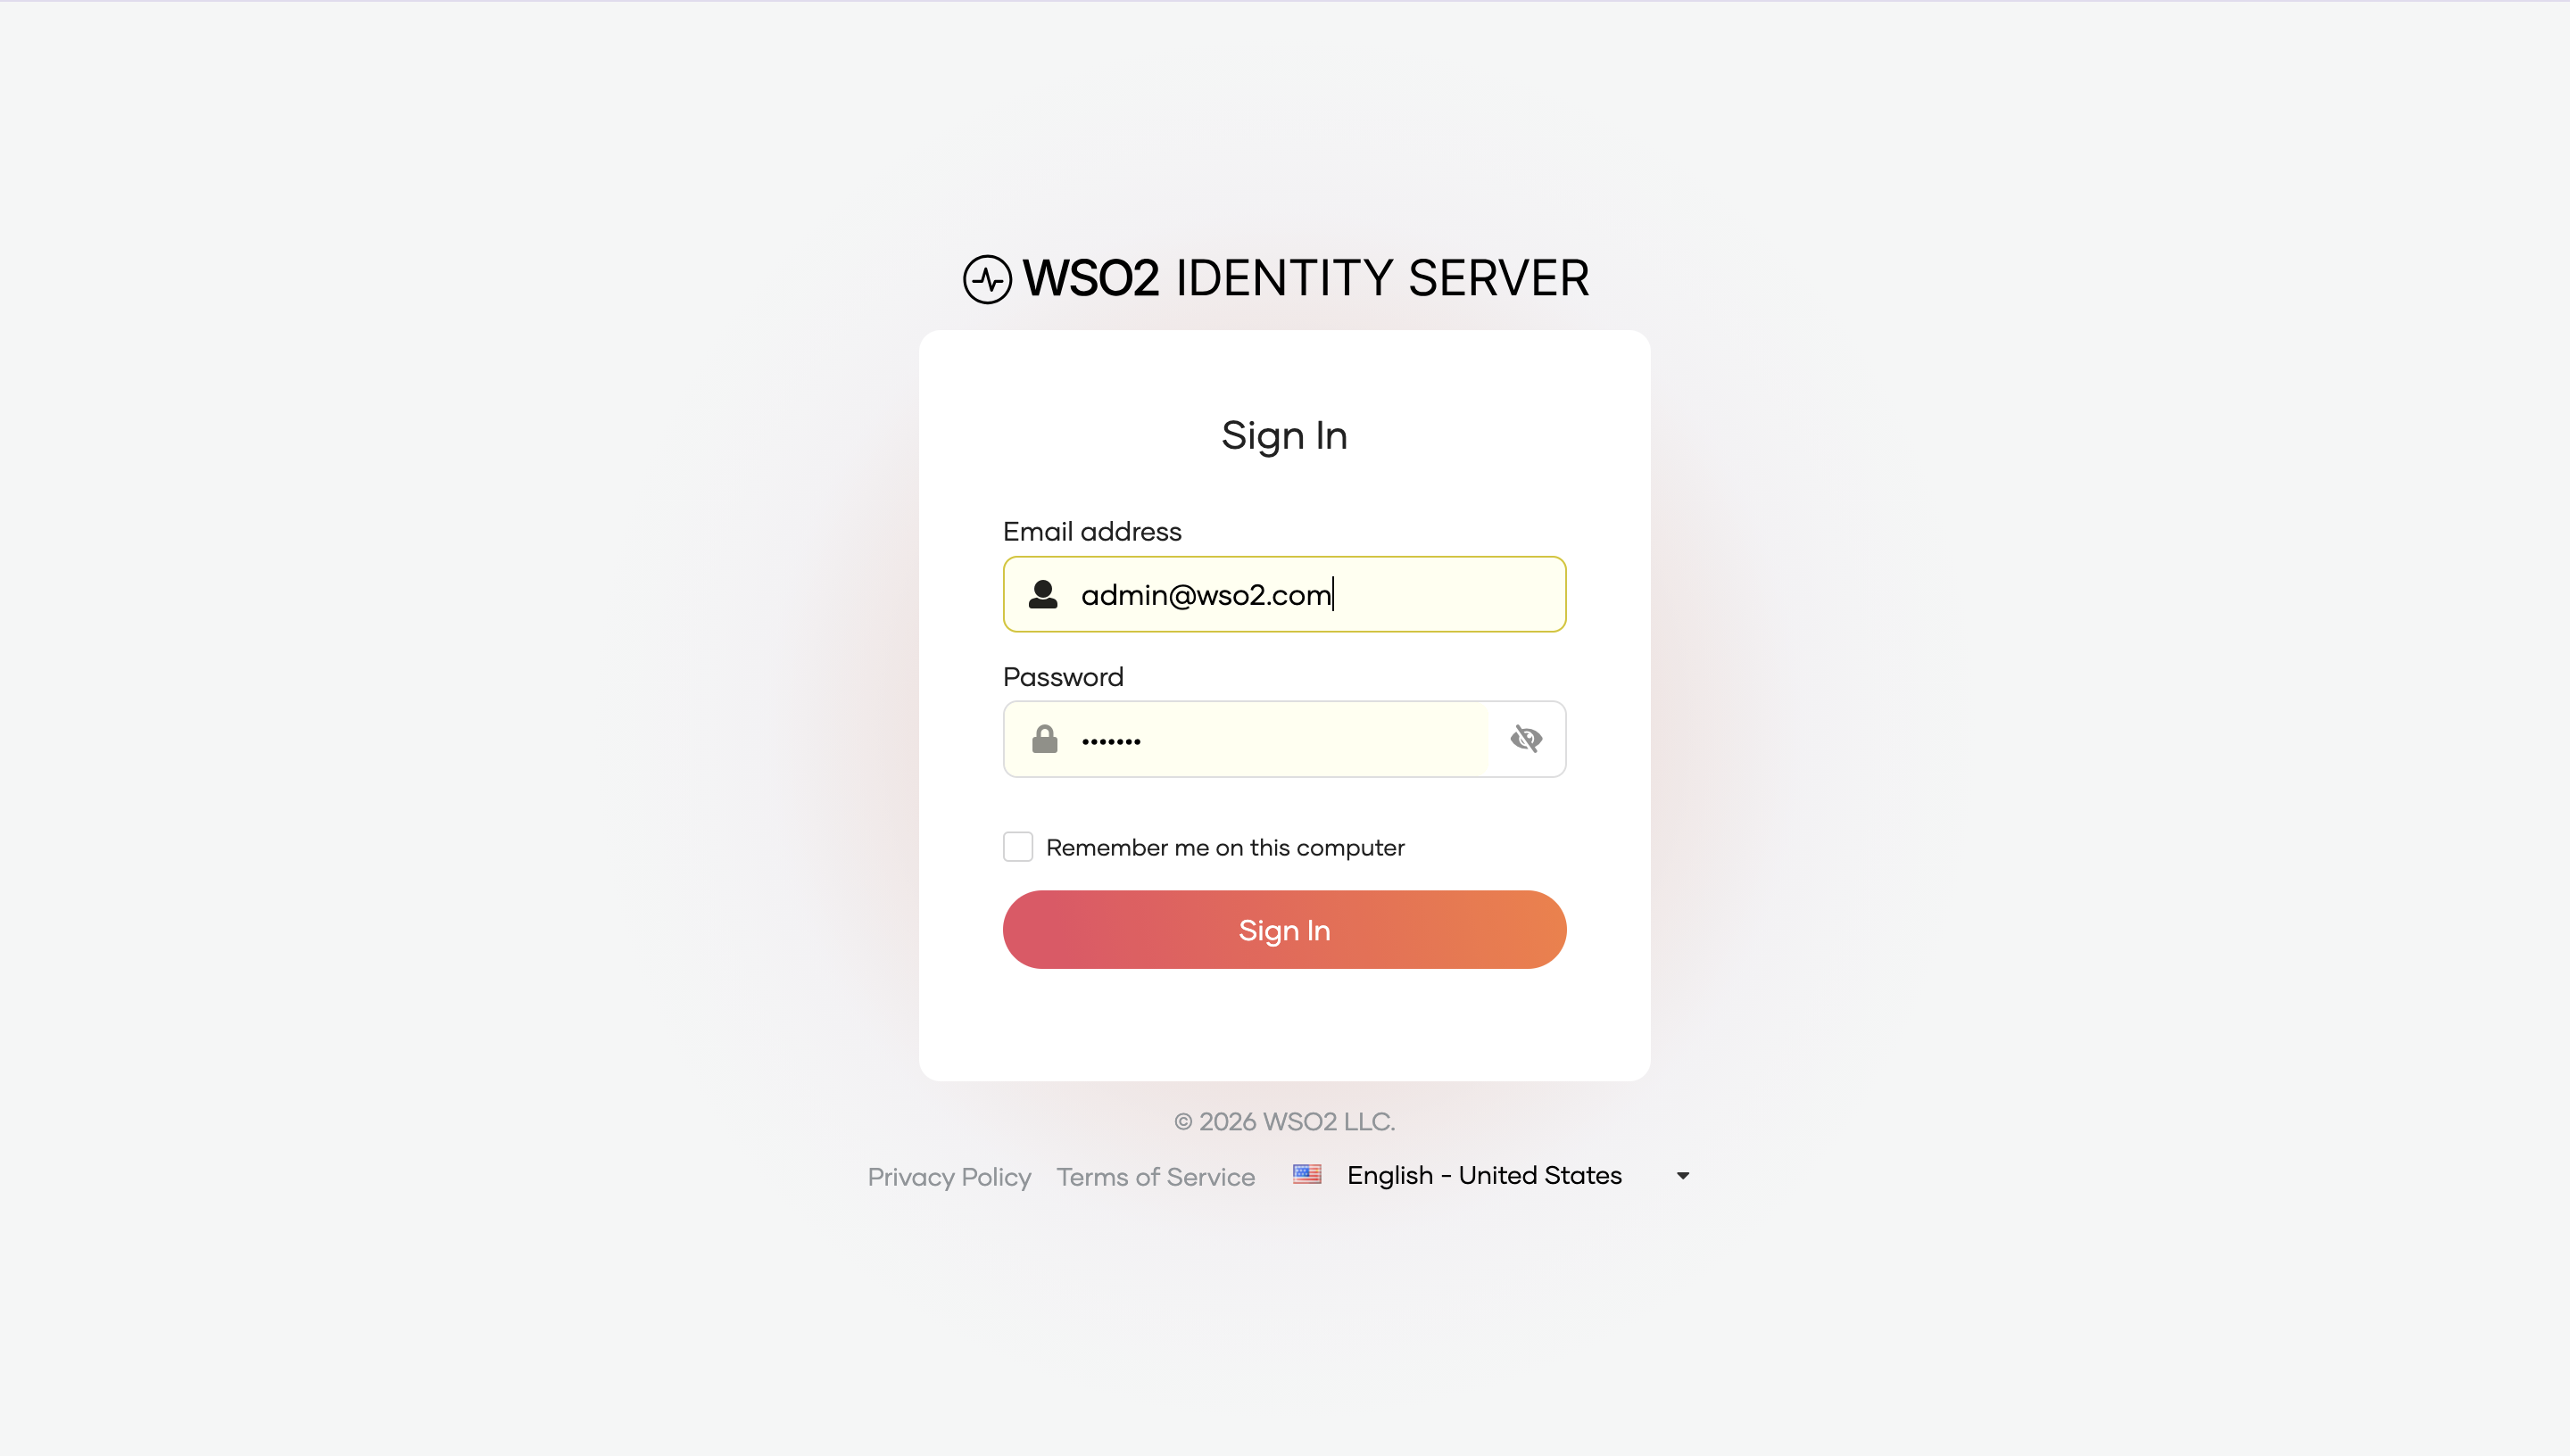
Step 2: Navigate to Users
In the left navigation sidebar, expand User Management and click Users.
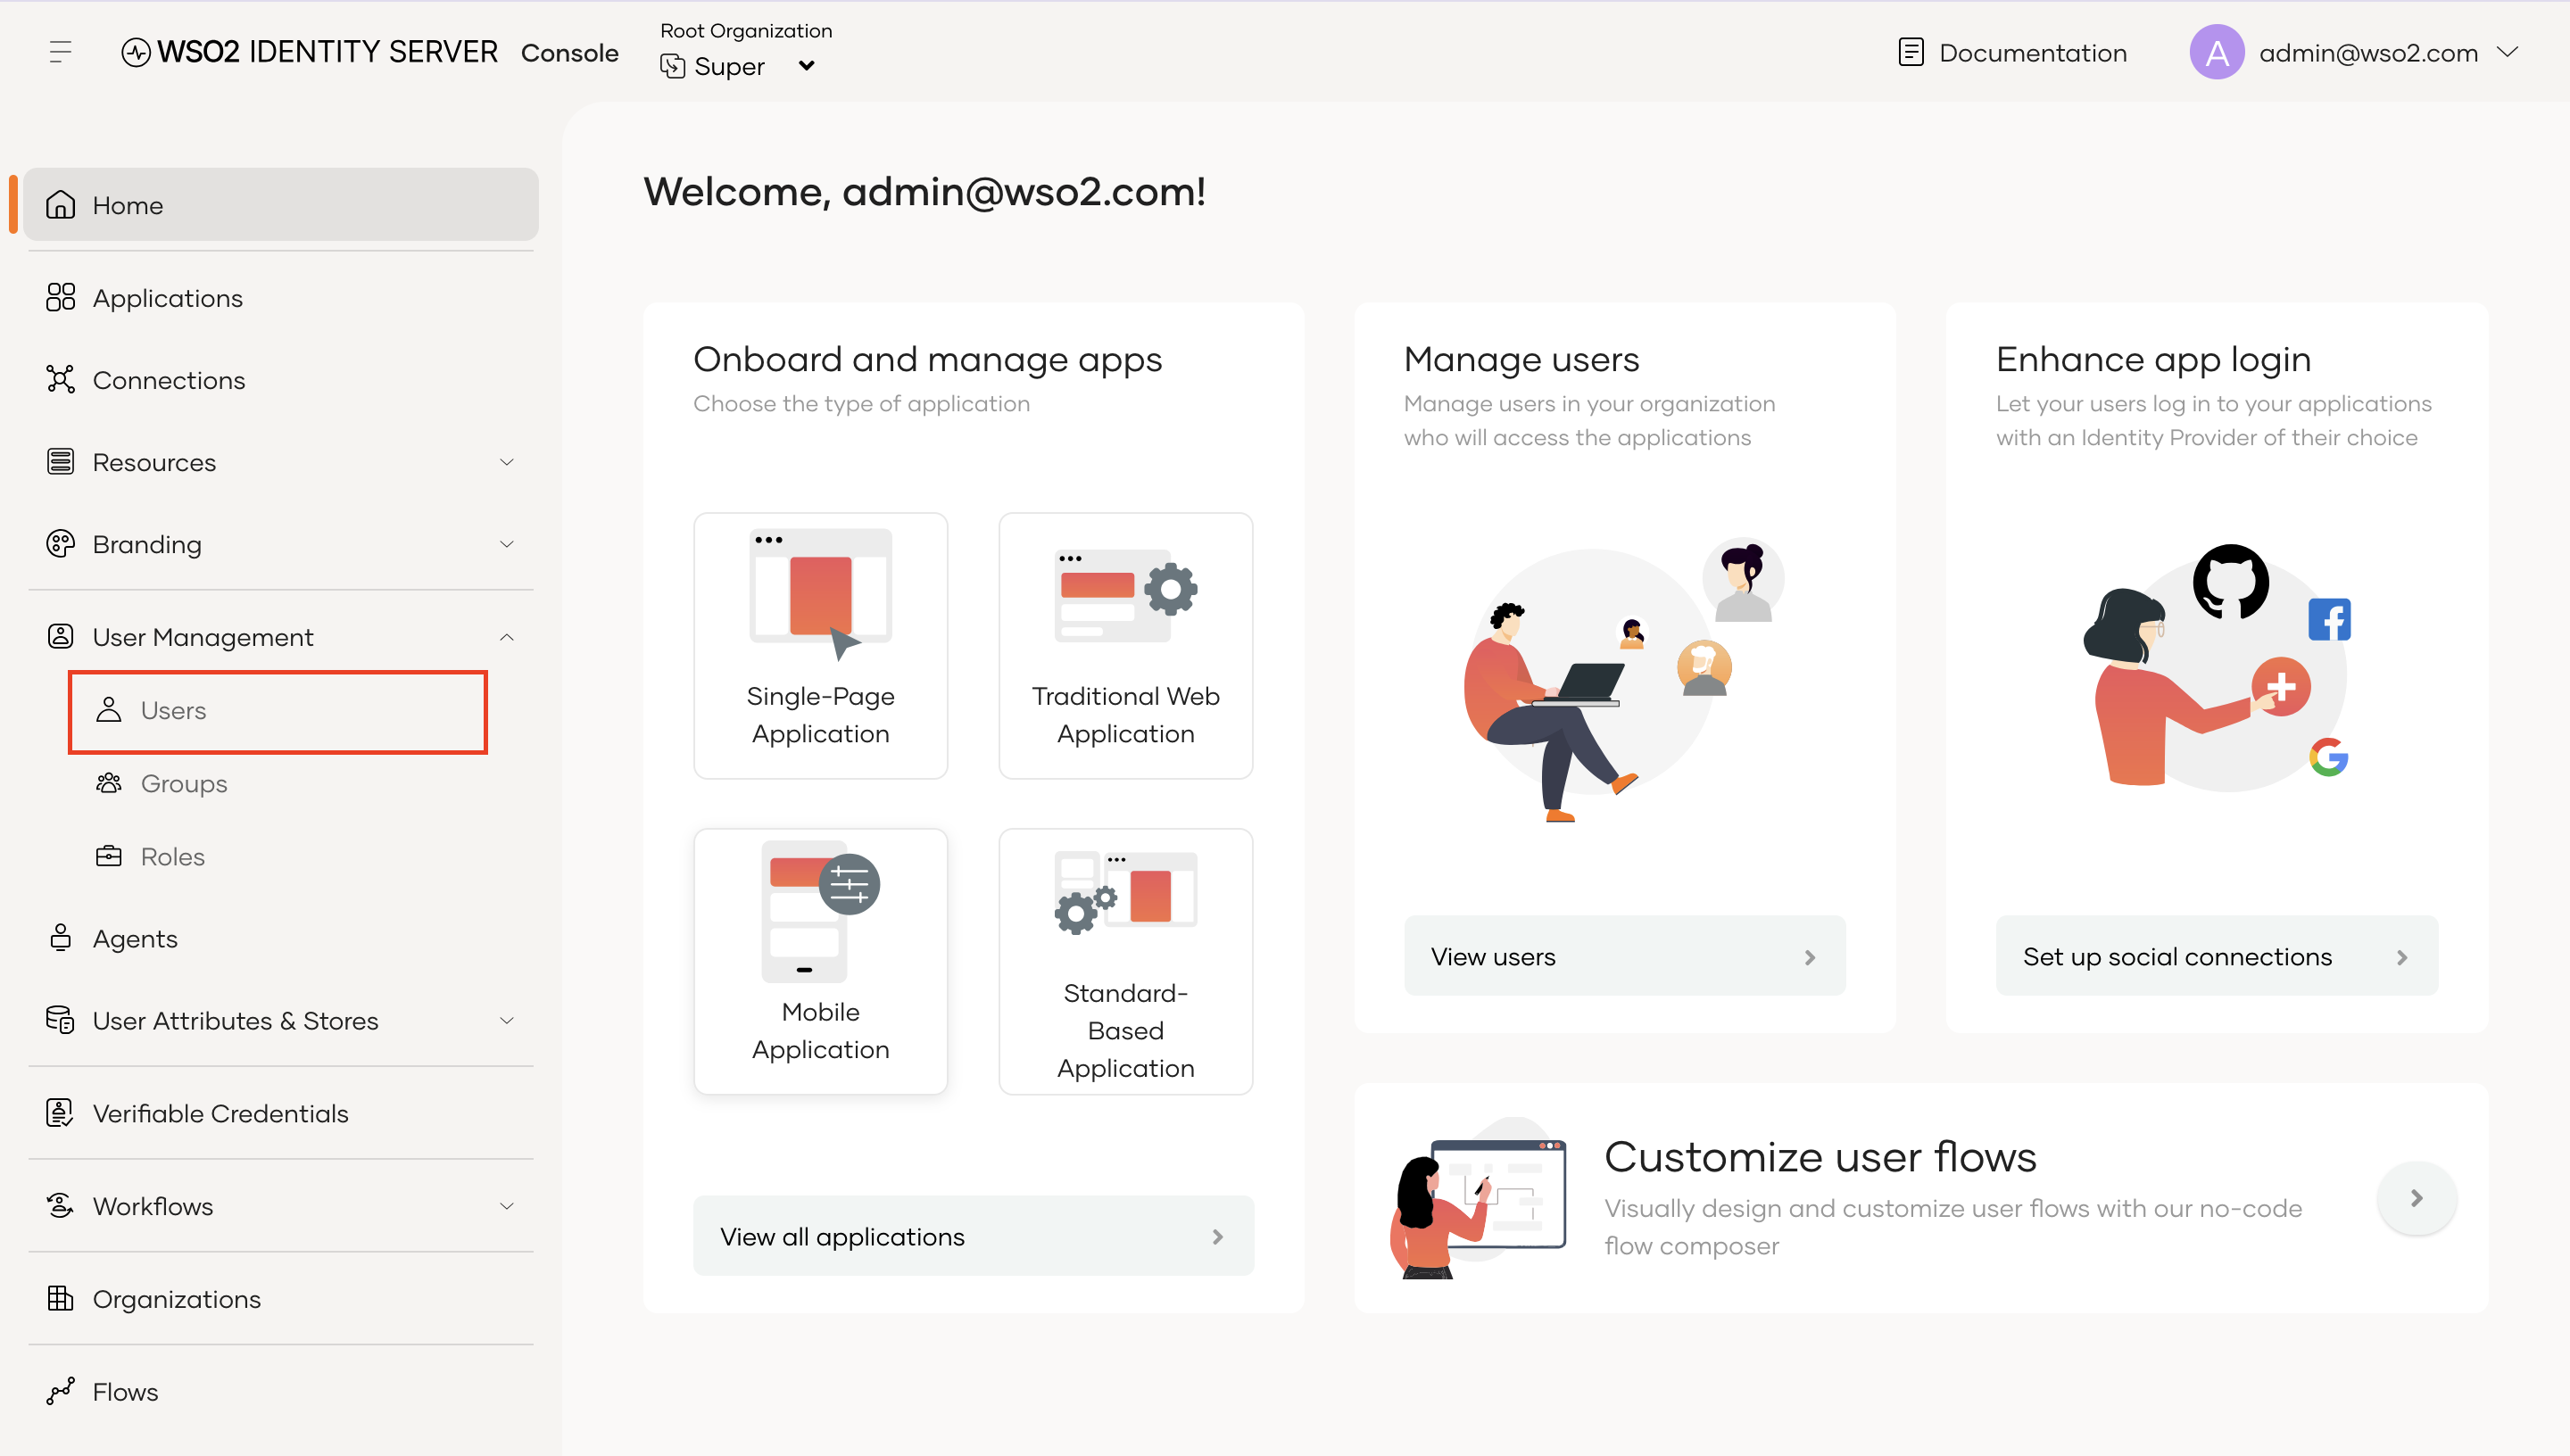
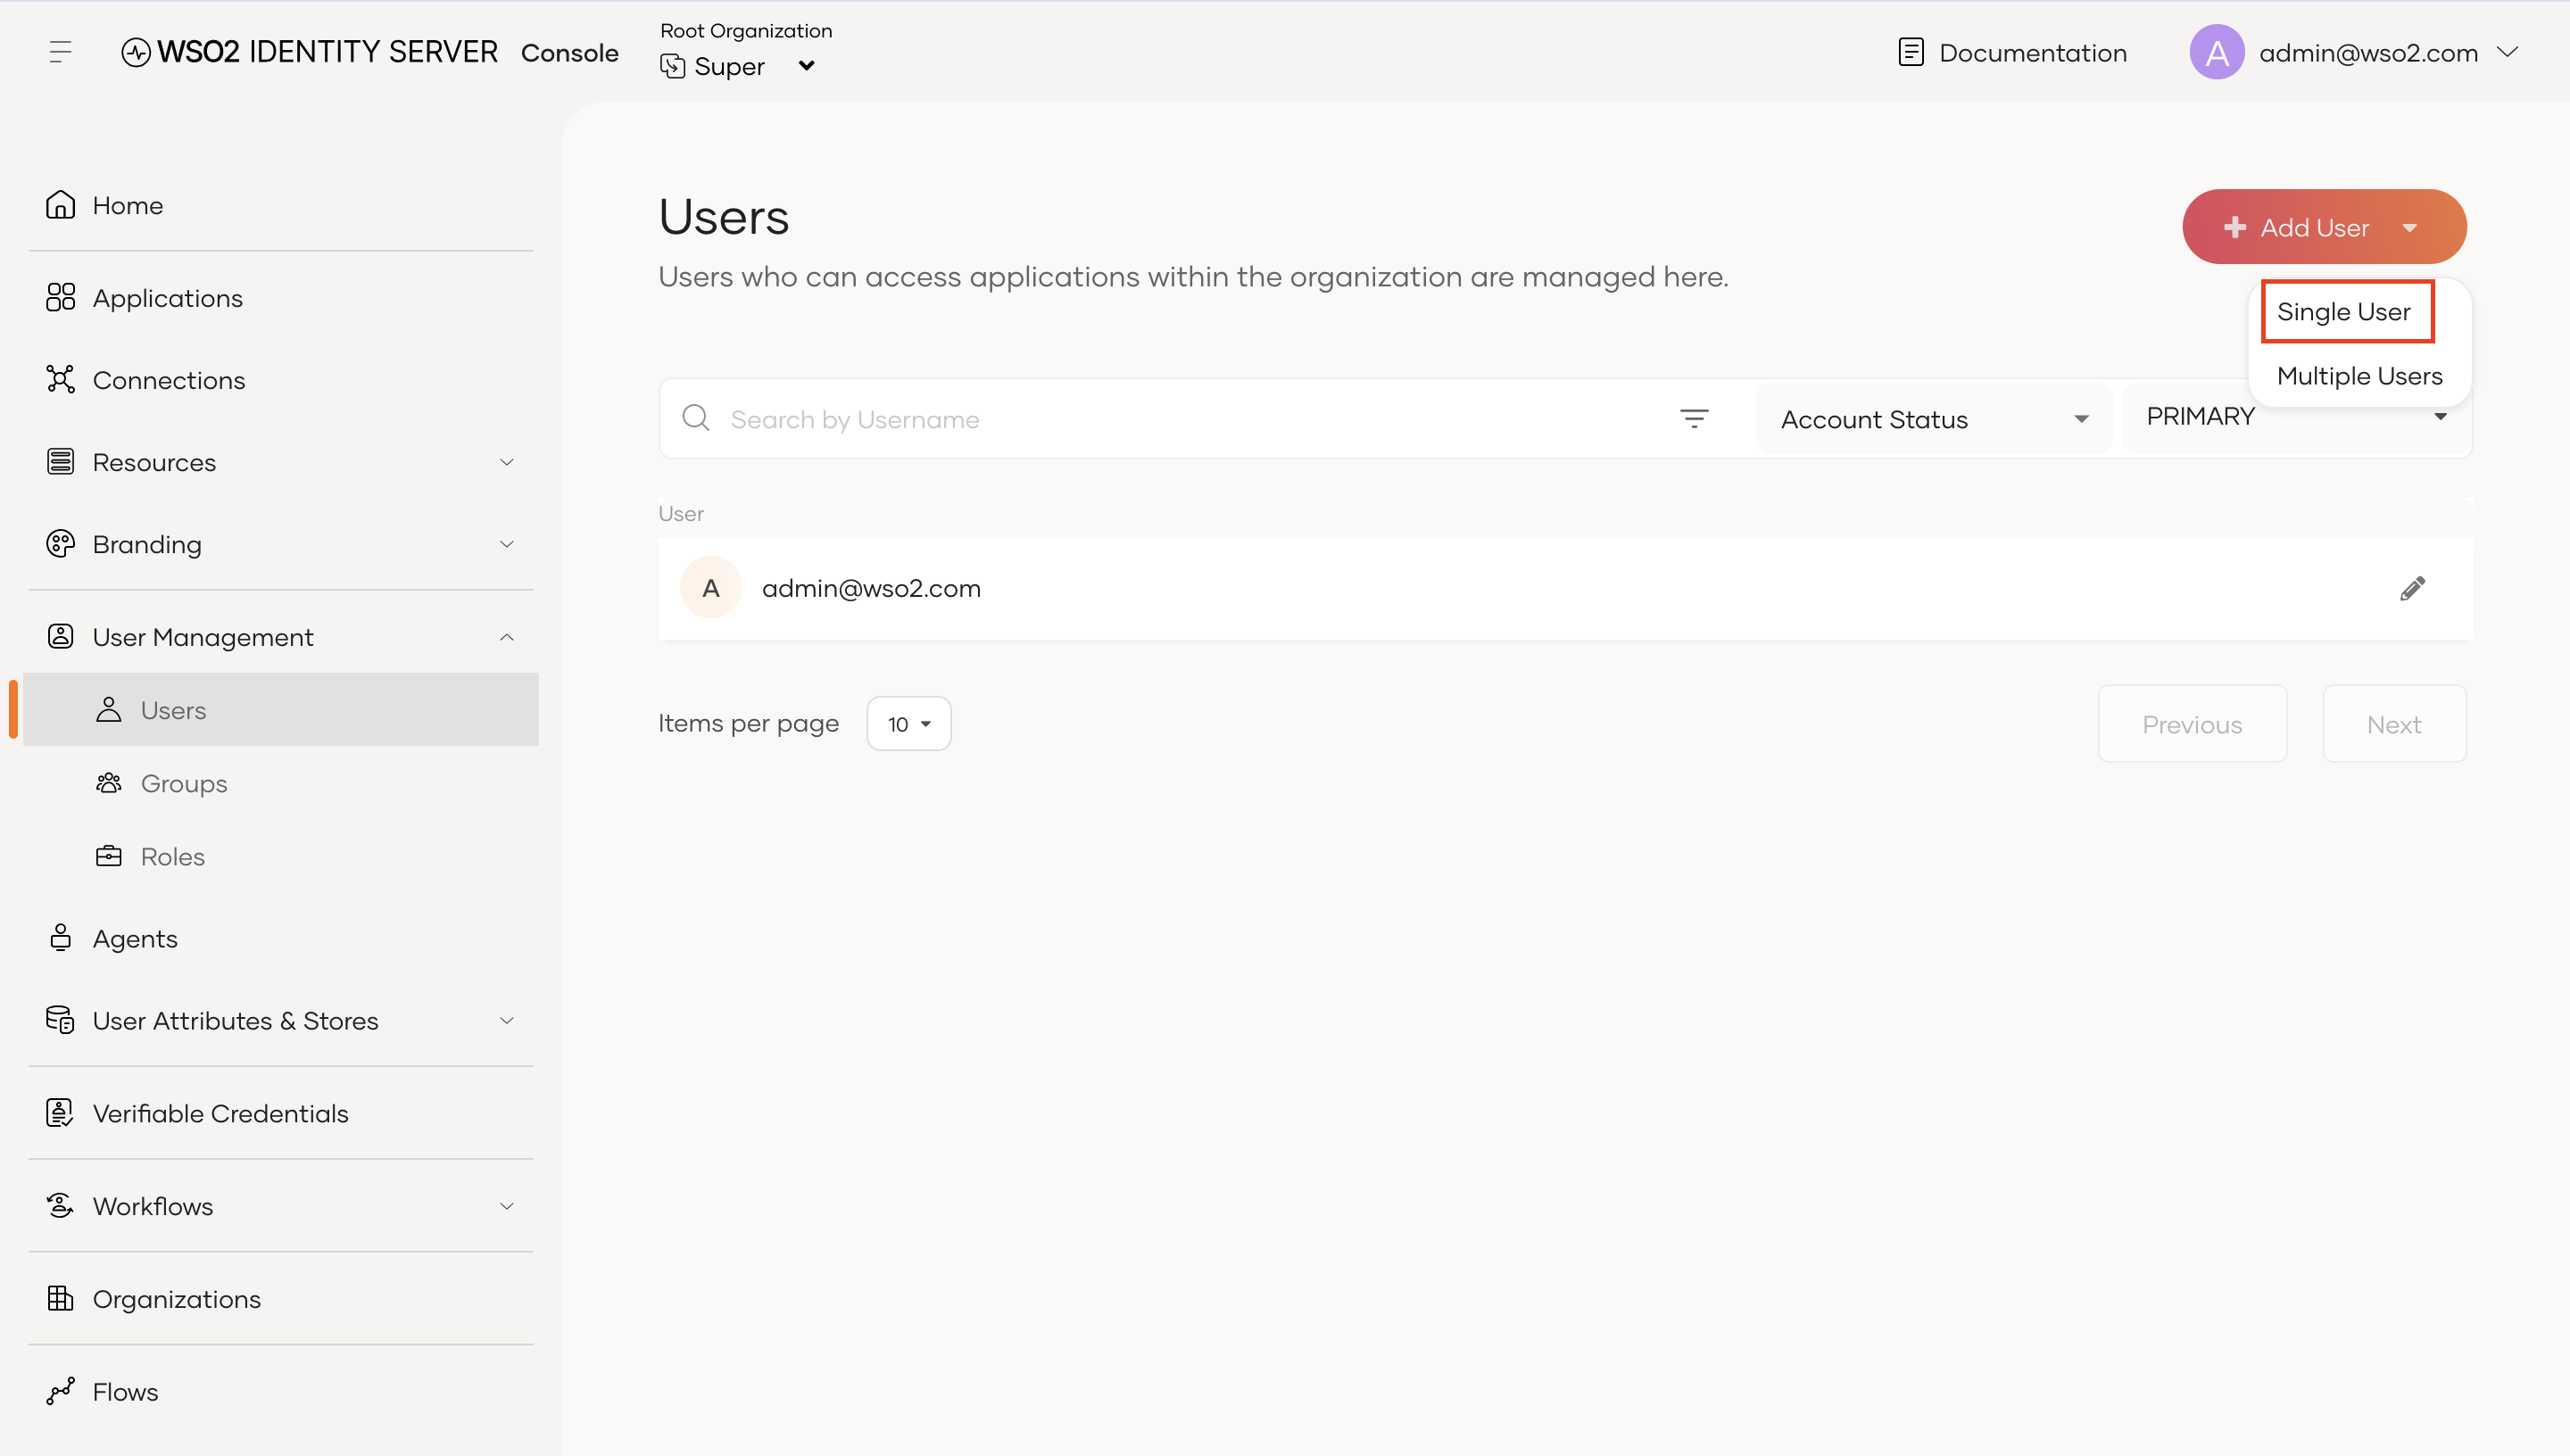
Step 3: Add a new user
On the top-right of the Users page, click + Add User and select Single User.
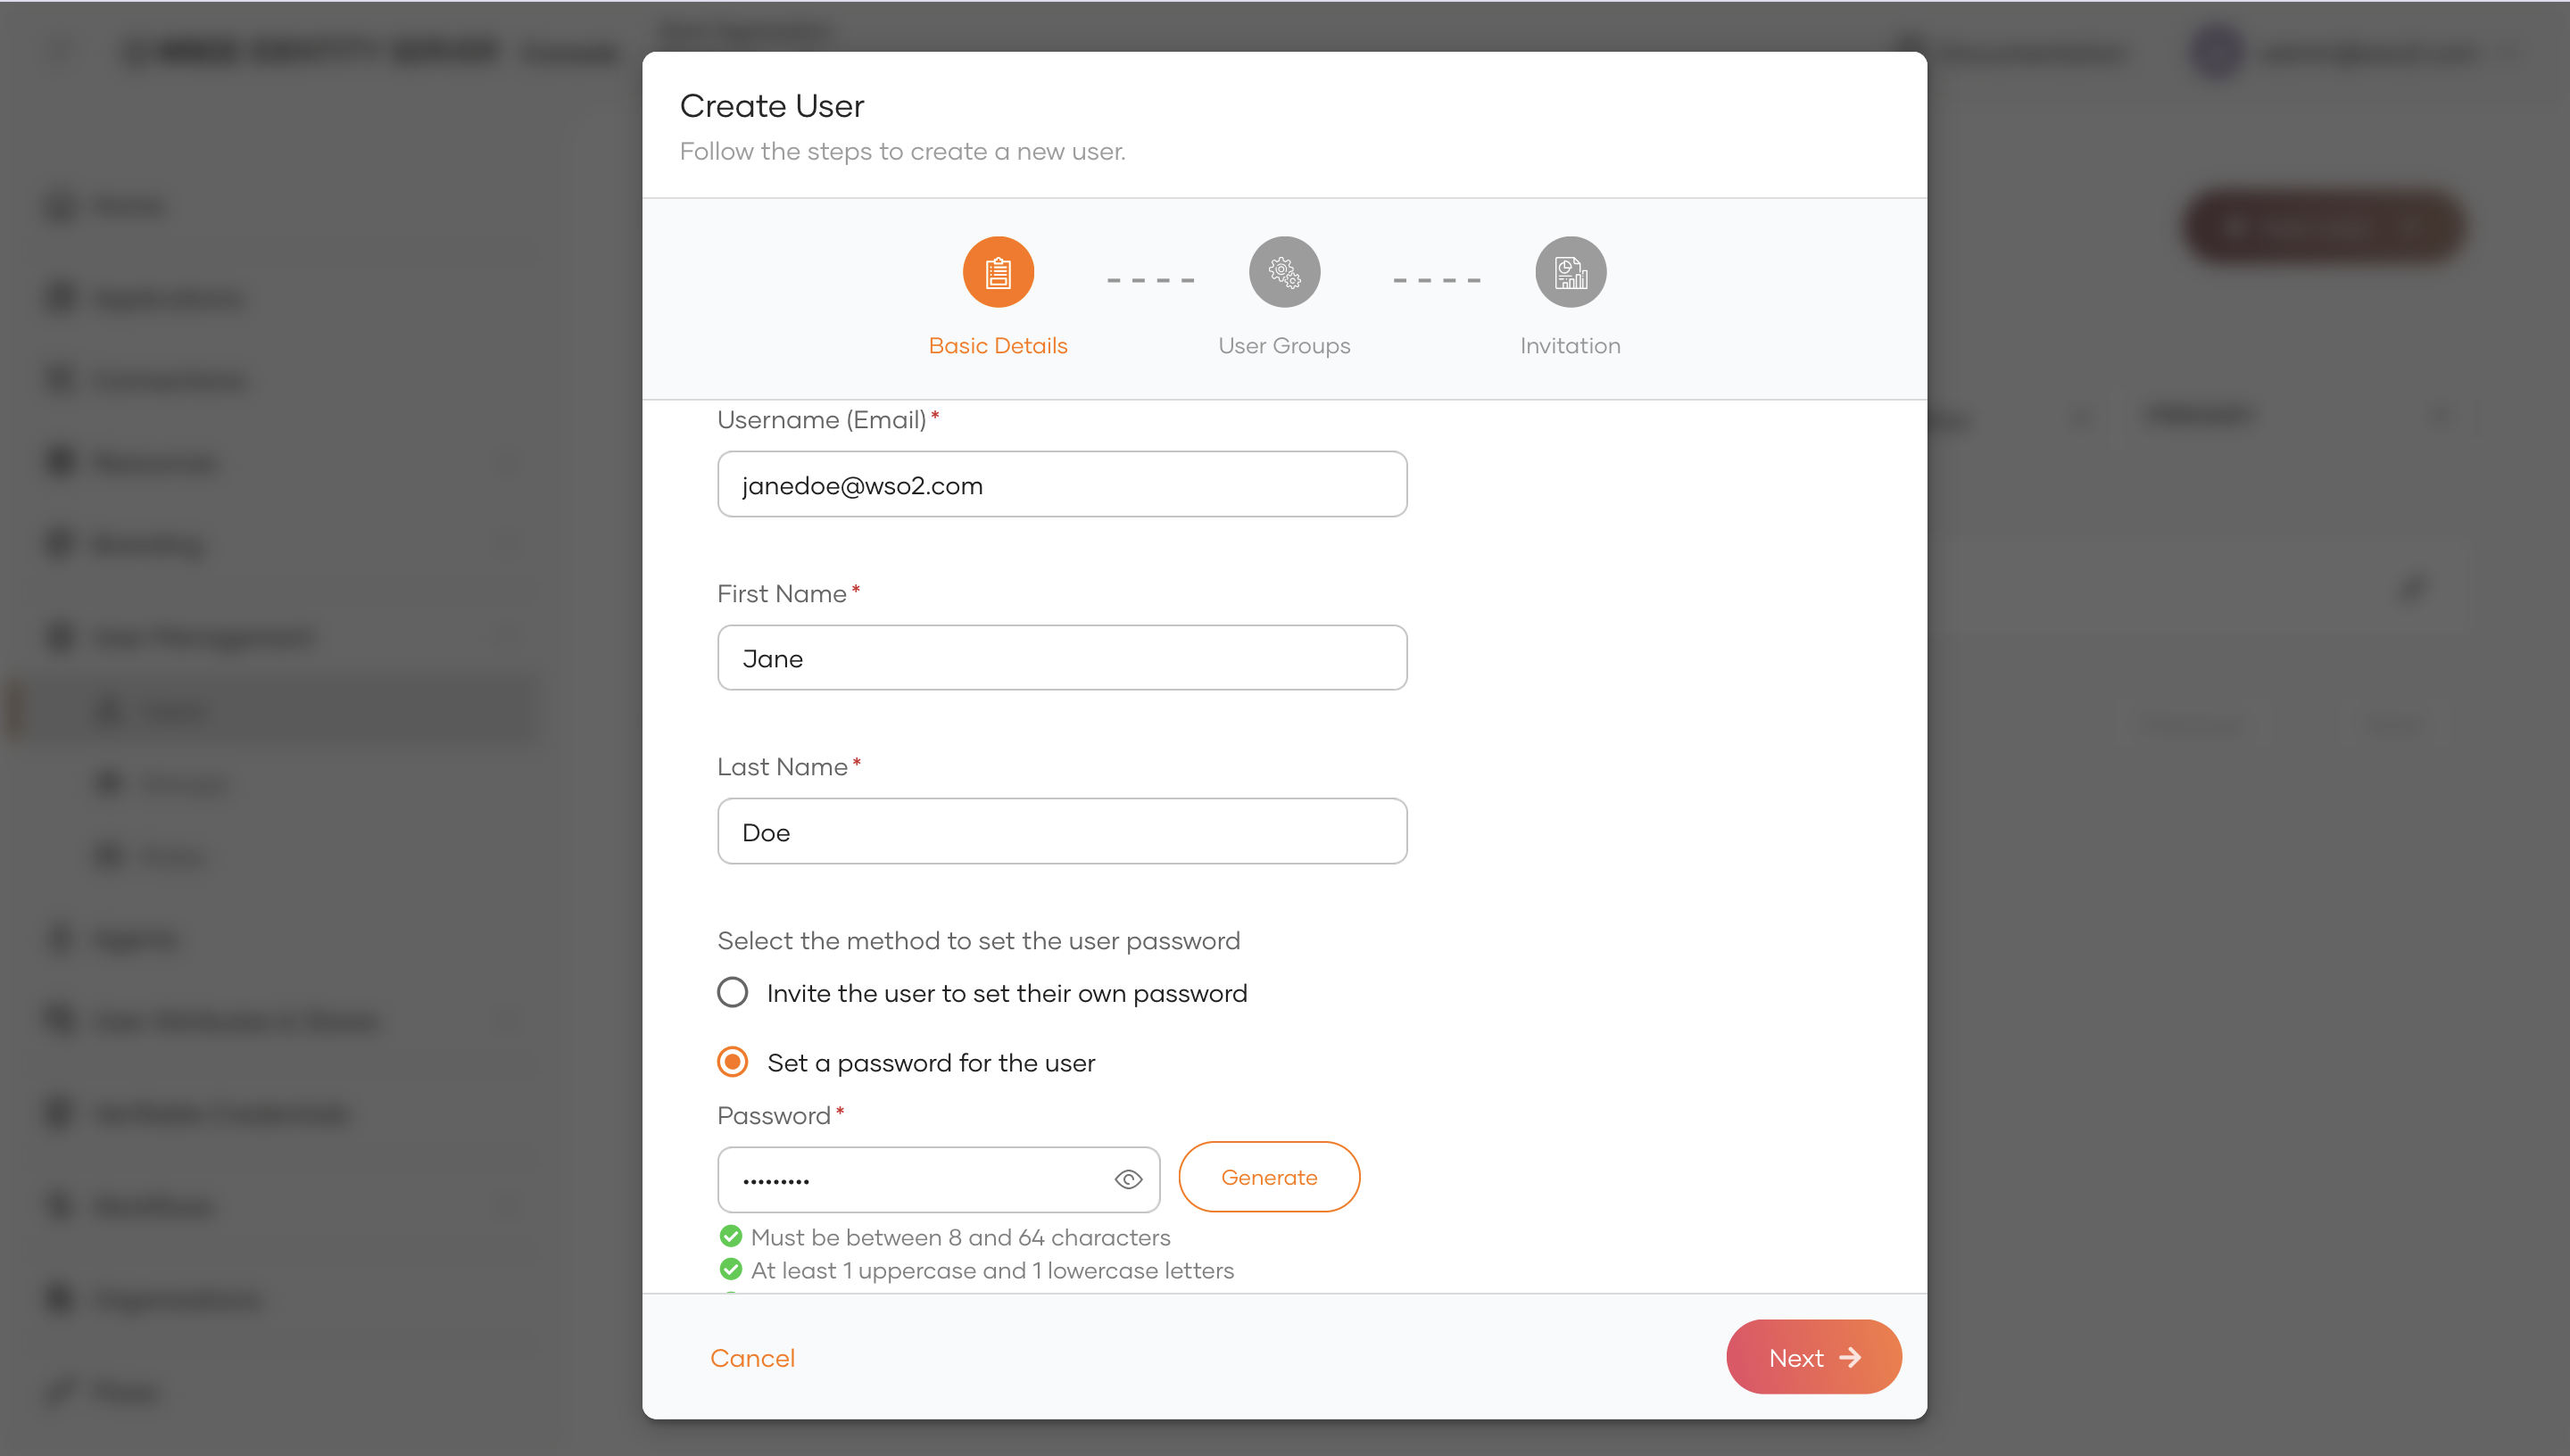
Step 4: Fill in basic user details
Enter the user's details in the Basic Details step:
- Username (Email): Enter the user's email address (for example,
janedoe@wso2.com).
Under the accelerator's default configuration, usernames are email addresses.
- First Name: Enter the user's first name (e.g.,
Jane). - Last Name: Enter the user's last name (e.g.,
Doe). - Password Method: Select Set a password for the user and enter a password that meets the displayed complexity requirements (or click Generate).
Click Next to proceed. You can optionally assign user groups on the next step or click Next to skip.
Step 5: Finish creation
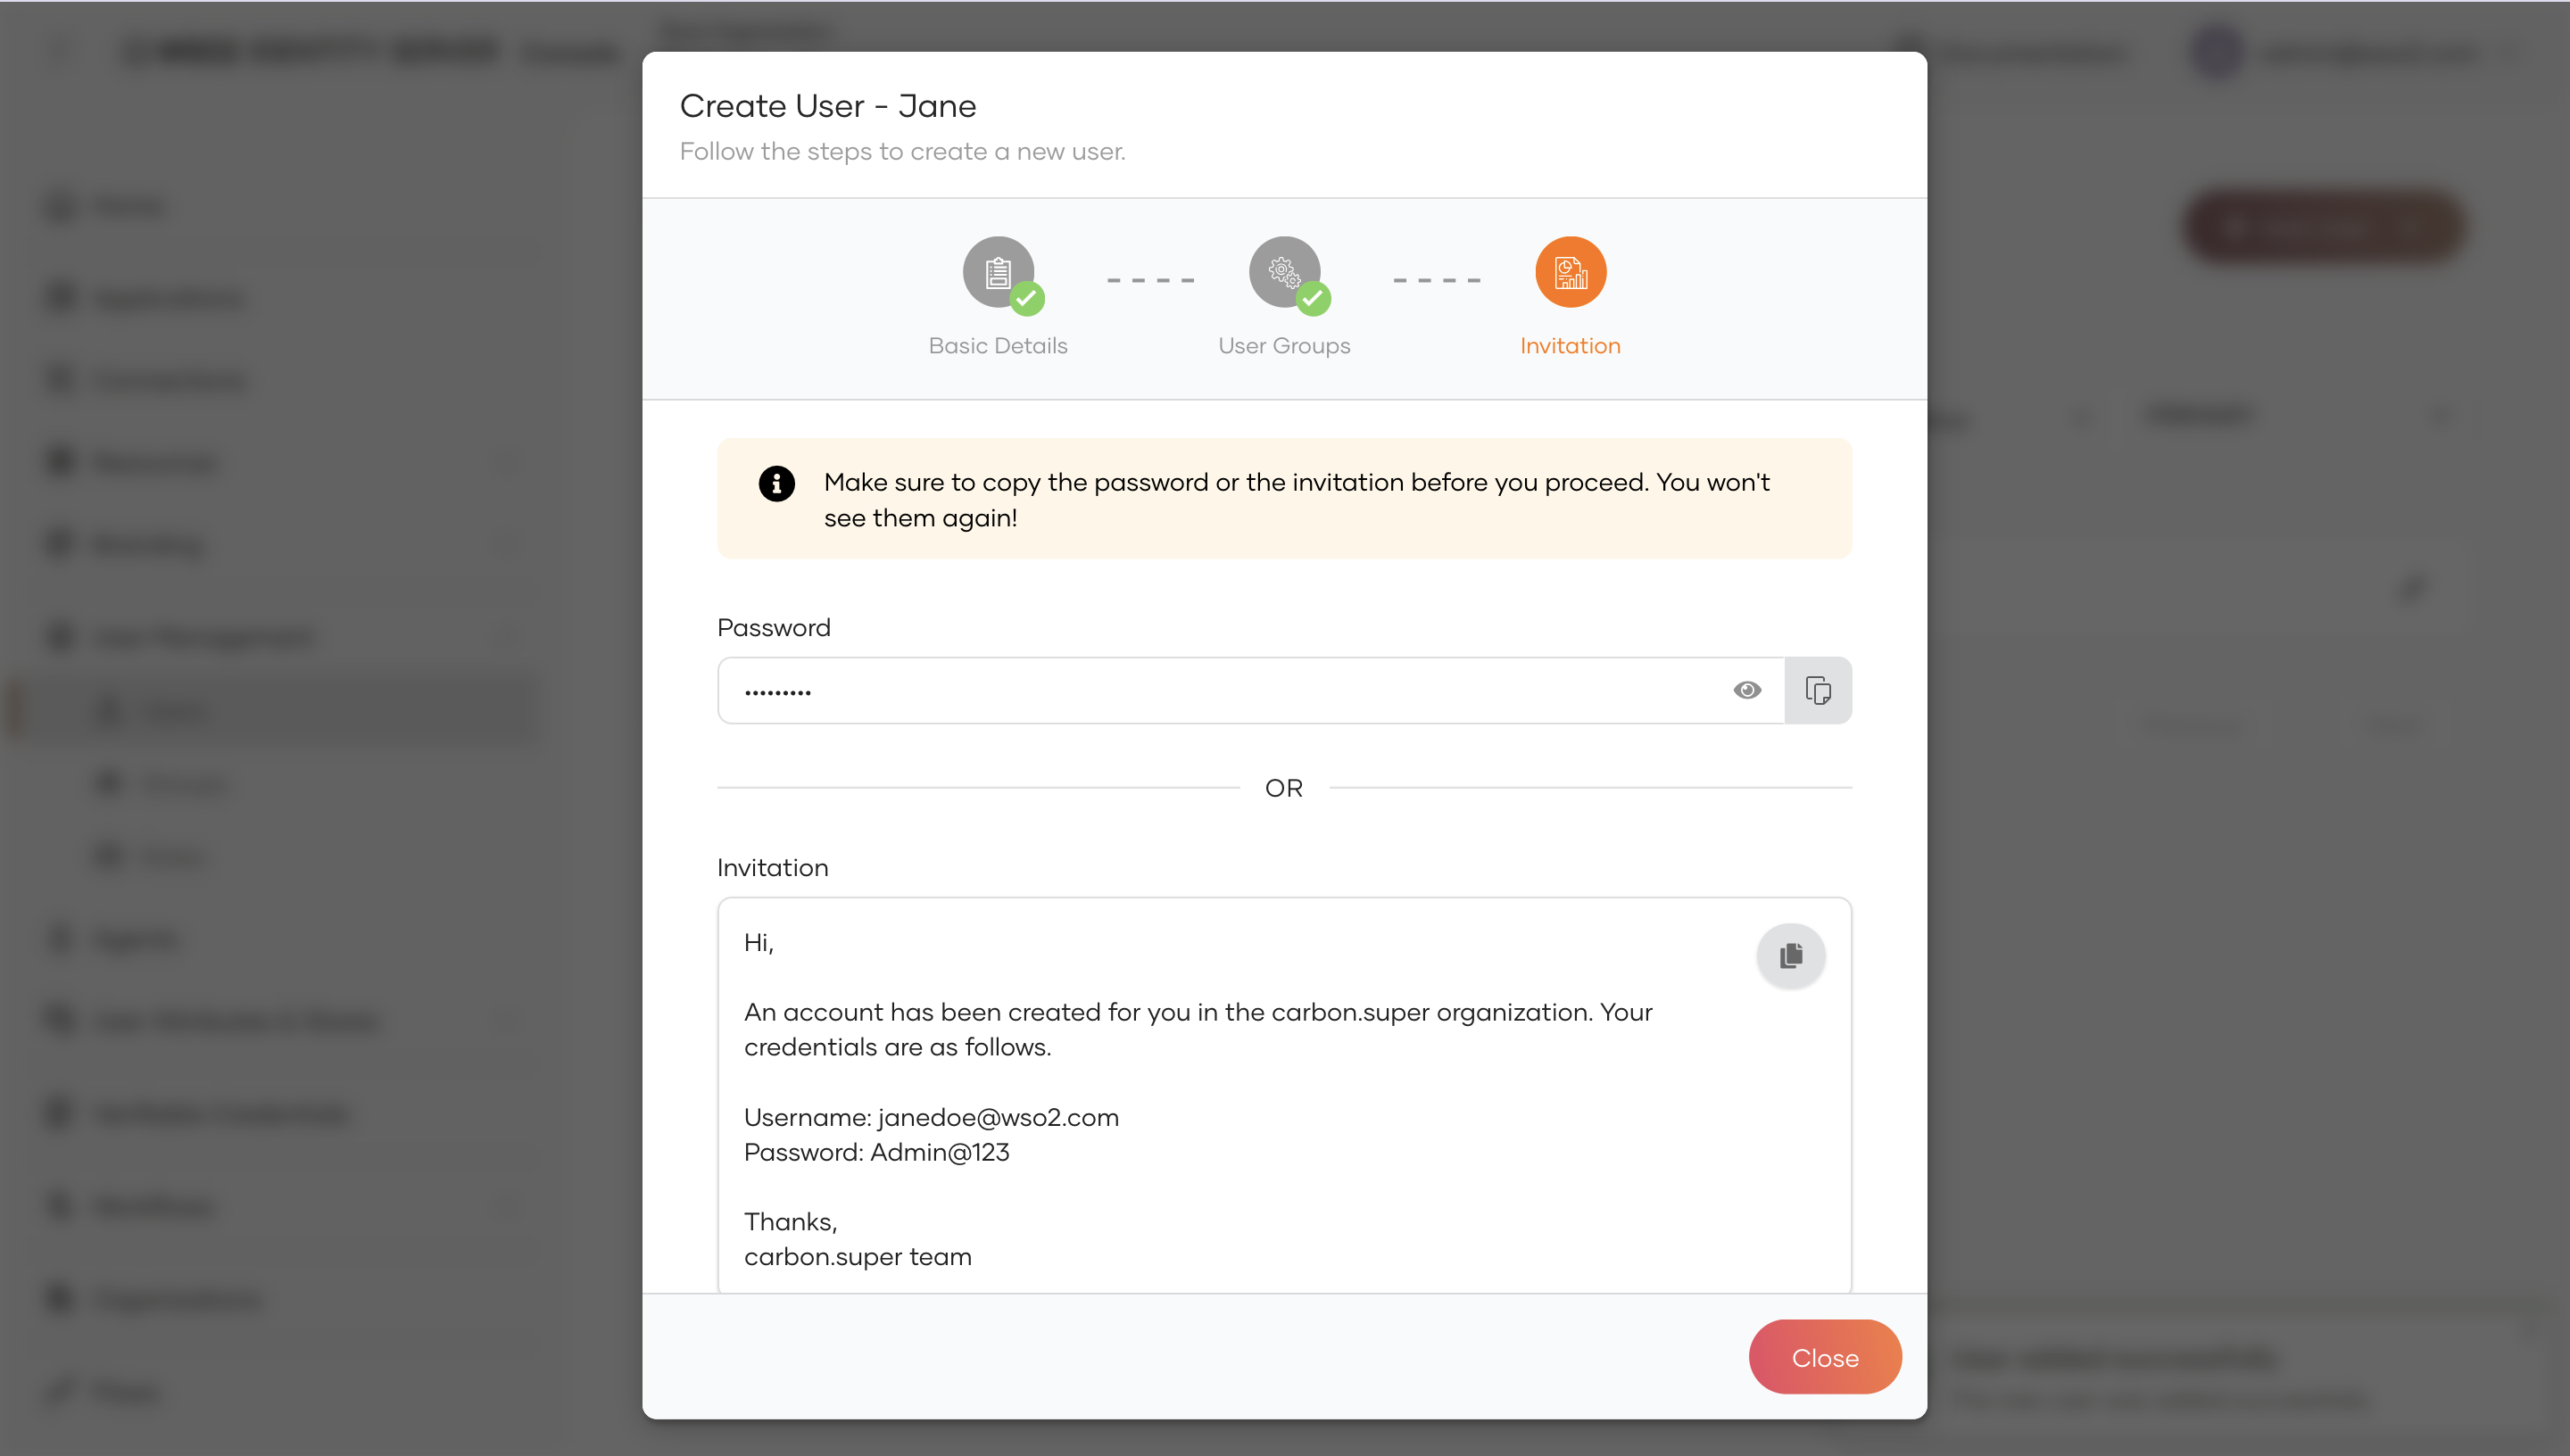
On the final Invitation step:
- Click Close to complete user creation.
2. Accelerator Roles Overview
The accelerator provides three predefined roles designed to separate user, administrative, and data protection responsibilities:
| Role | Target Persona | Key Capabilities |
|---|---|---|
dpdp-consent-admin | System & Organization Administrators | Full oversight over consents, purpose/element catalog management, tenant-wide complaint management, and event notification subscriptions. |
dpdp-consent-dpo | Data Protection Officers (DPO) | Organization-wide complaint inspection, review, internal notes, and complaint resolution without administrative consent privileges. |
dpdp-consent-user | Data Principals / End Users | Self-service account deletion (DELETE /scim2/Me), personal complaint filing and tracking, and personal consent history audit views. |
- Basic Consent Access: End users can log into the Consent Portal, view their active consents, and authorize or revoke consents without any role assigned. Assign
dpdp-consent-userwhen they need to file complaints, view audit history, or delete their accounts. - Role Assignment:
dpdp-consent-adminis not automatically assigned todpdp-consent-dpo. If a user requires both administrative oversight and DPO complaint handling capabilities, assign both roles explicitly.
For detailed information on permissions and OAuth scopes associated with each role, see the Role Management Guide.
3. Assigning Accelerator Roles
After creating the user, assign them to the appropriate DPDP role.
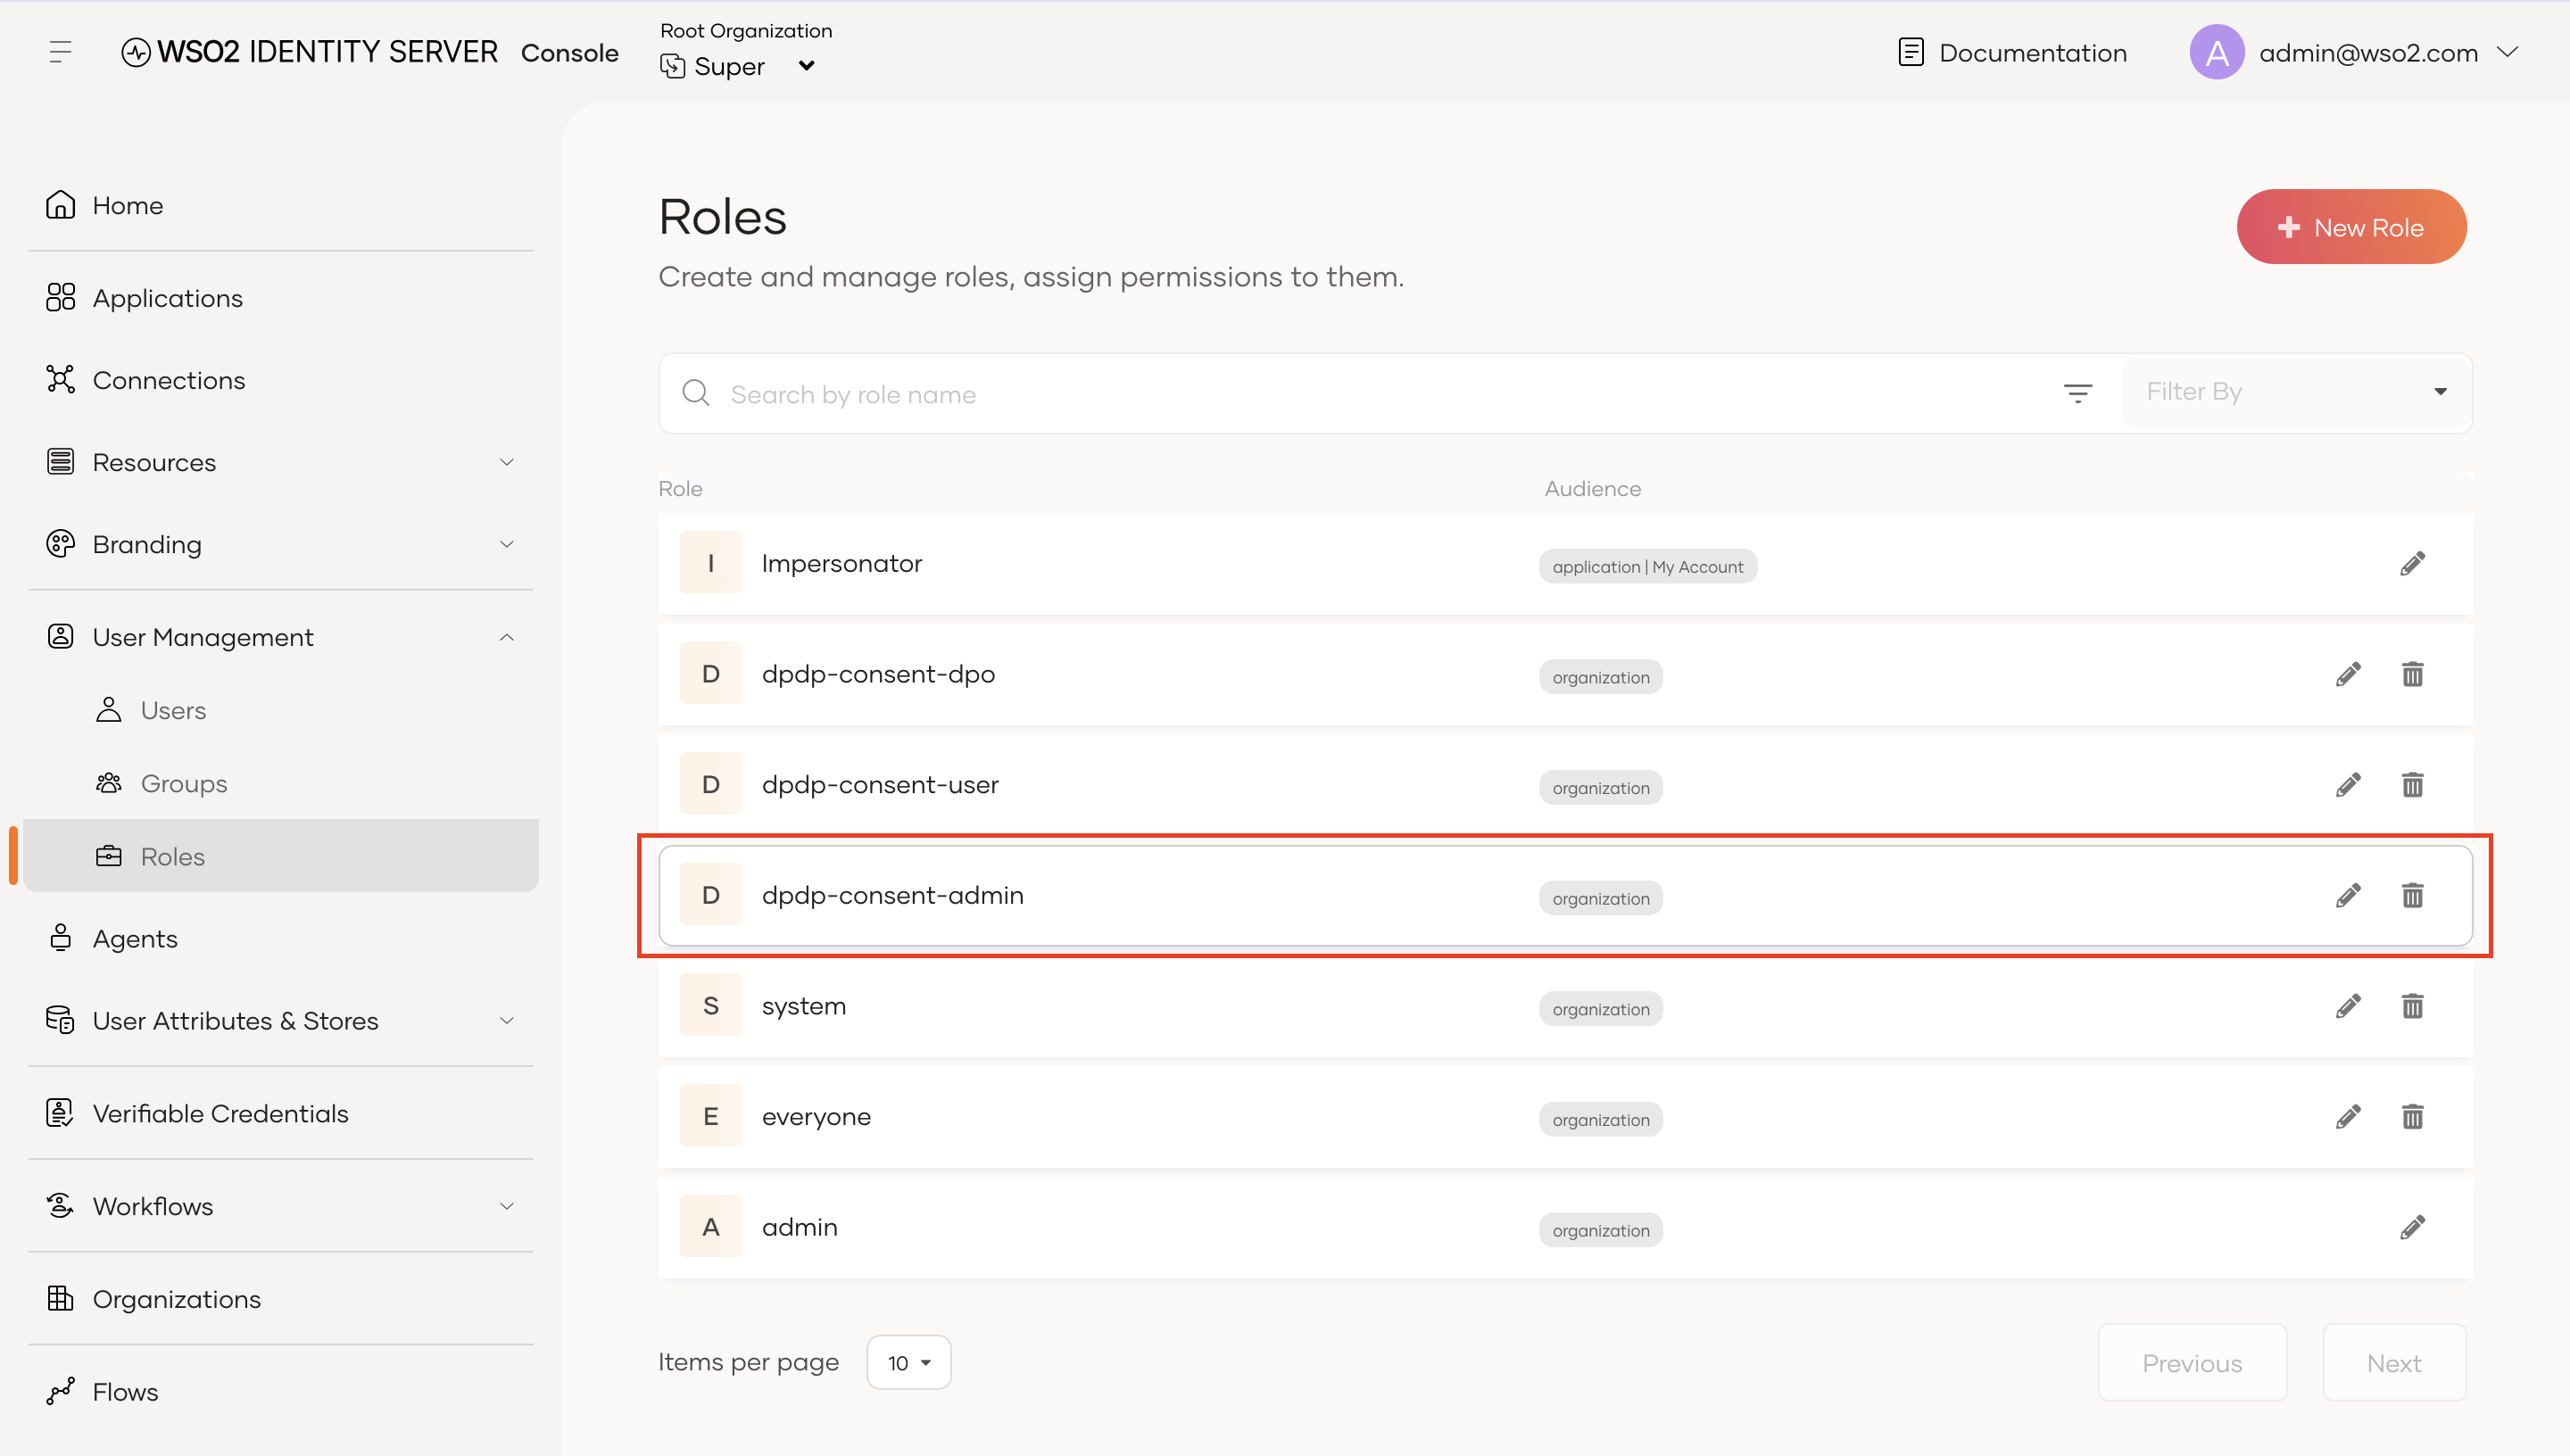
Step 1: Navigate to Roles
In the left navigation sidebar, expand User Management and click Roles.
You will see the accelerator's predefined roles:
dpdp-consent-admindpdp-consent-dpodpdp-consent-user
Select the role you want to assign (for example, click the edit icon on dpdp-consent-admin).
Step 2: Open the Users tab
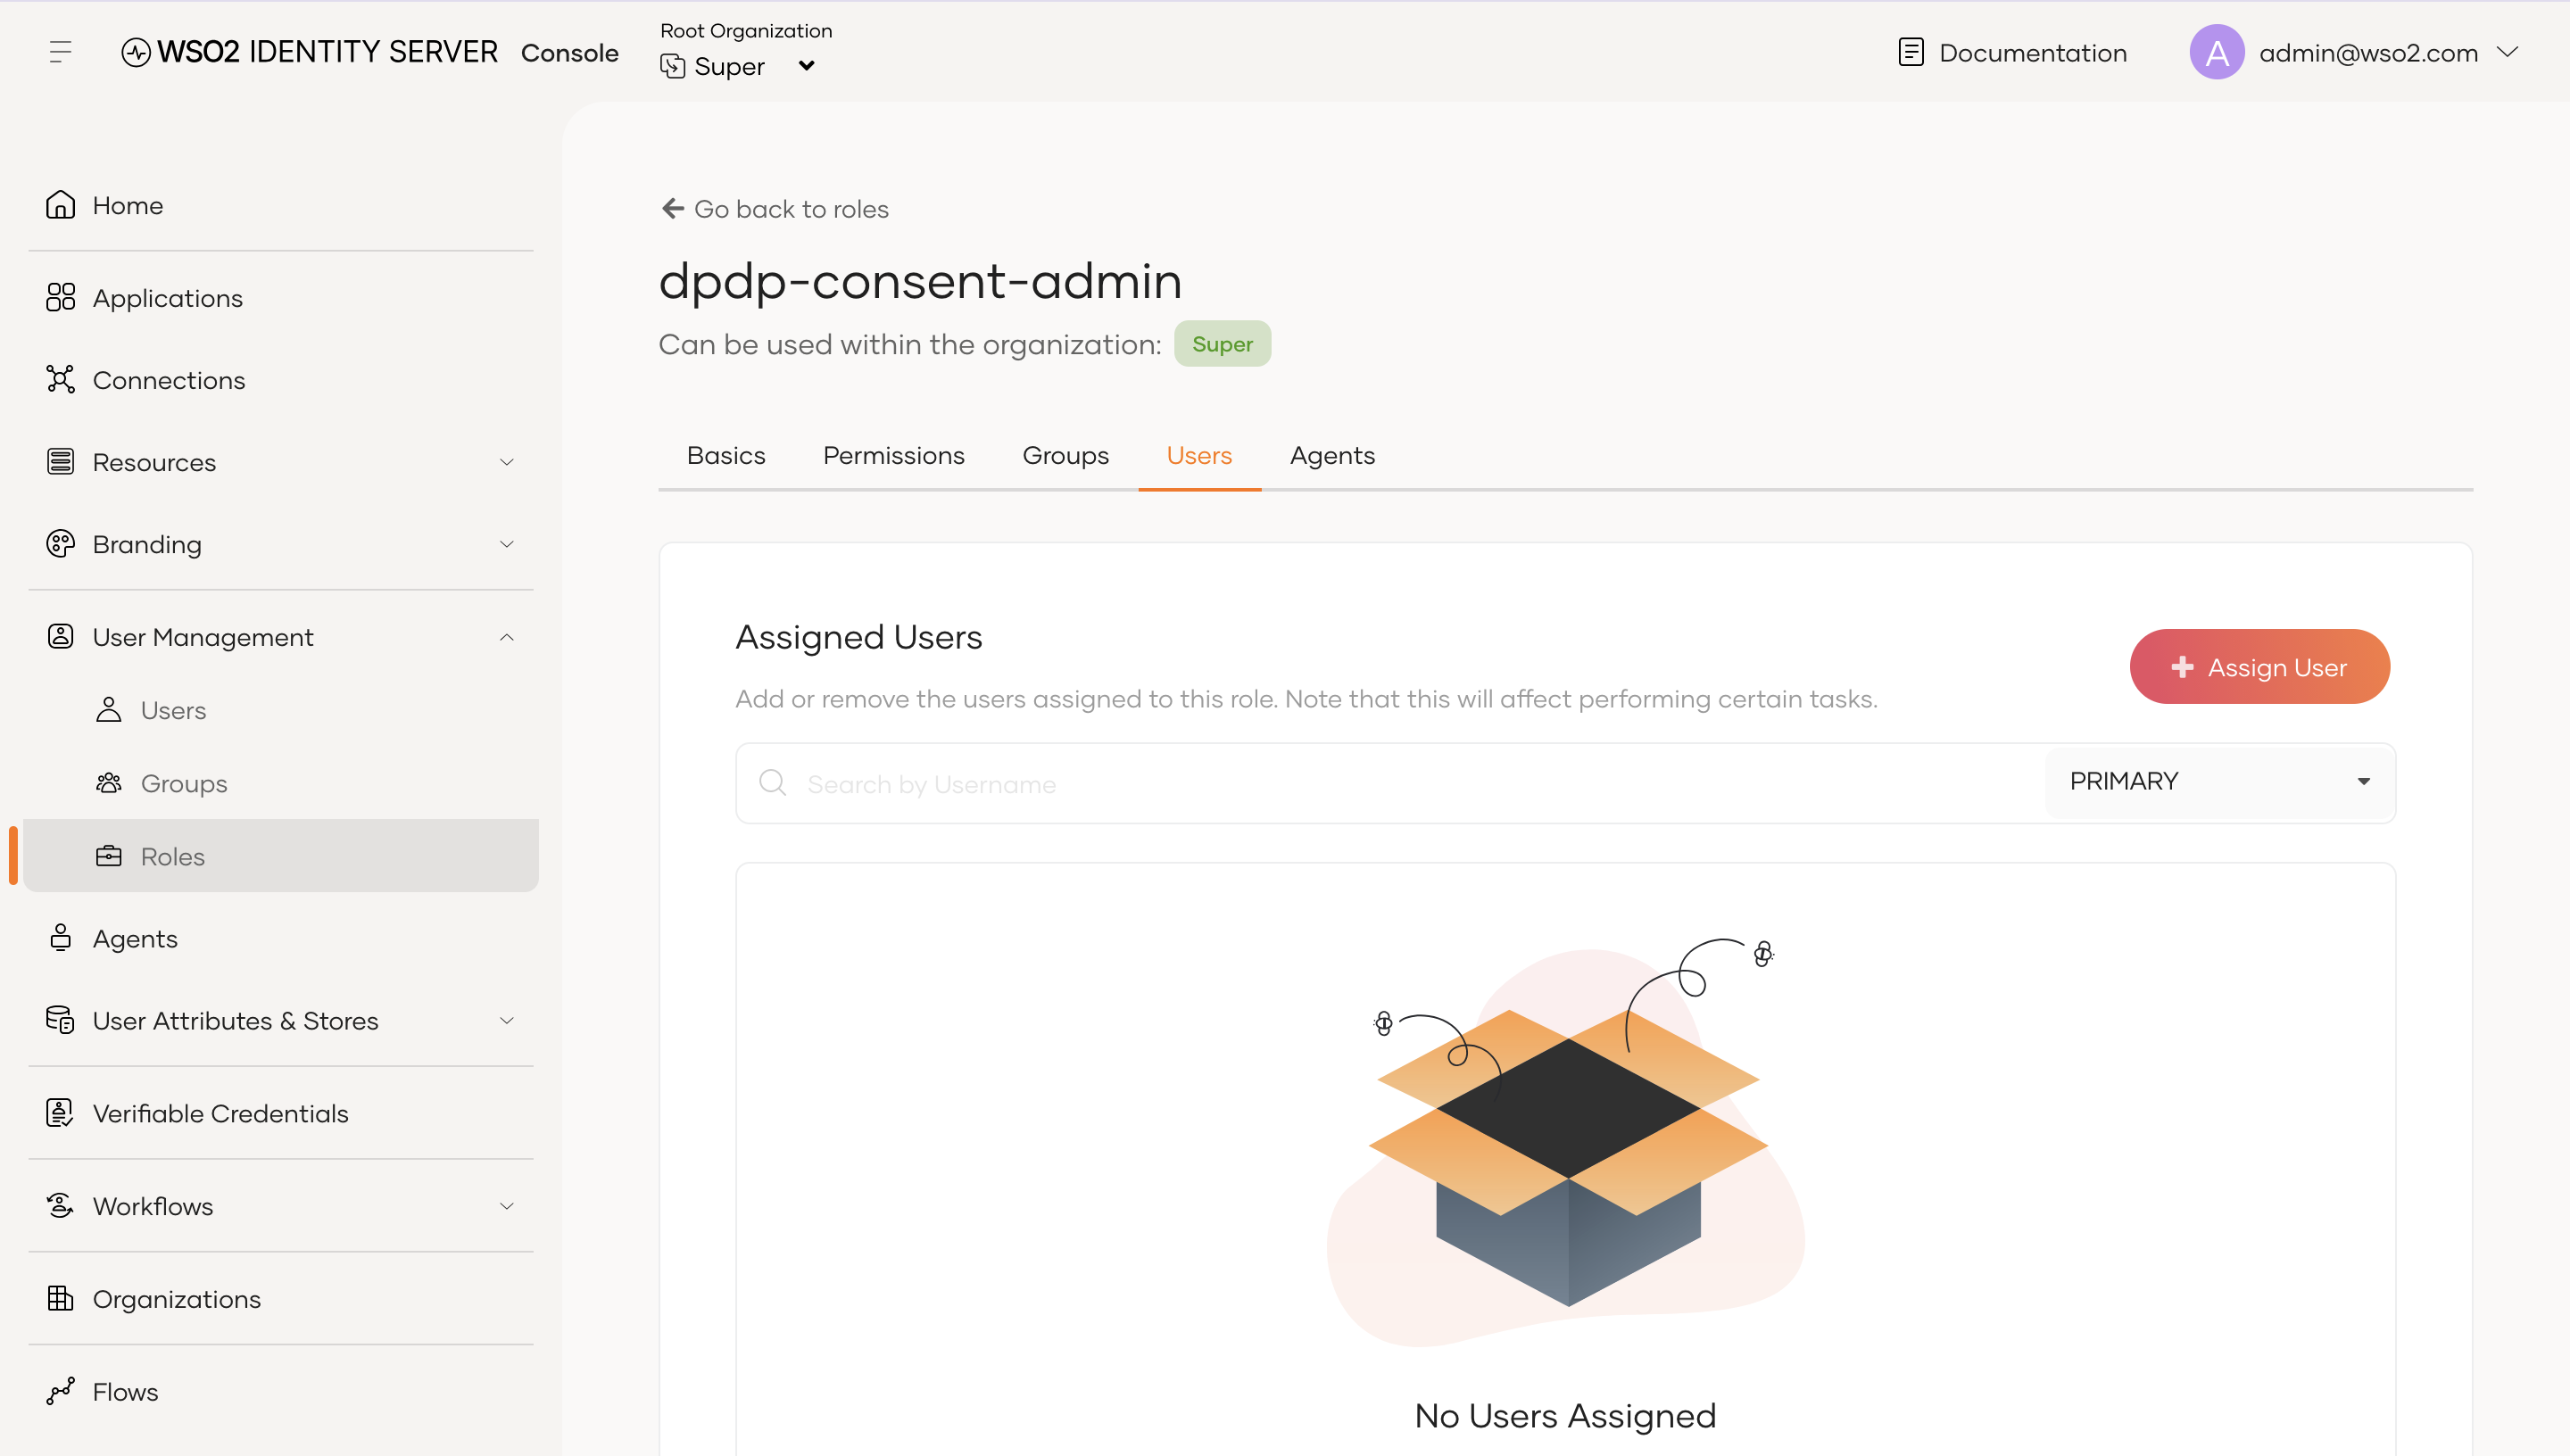
In the role details view:
- Click the Users tab from the top tab menu.
- Click the + Assign User button.
Step 3: Select and assign the user
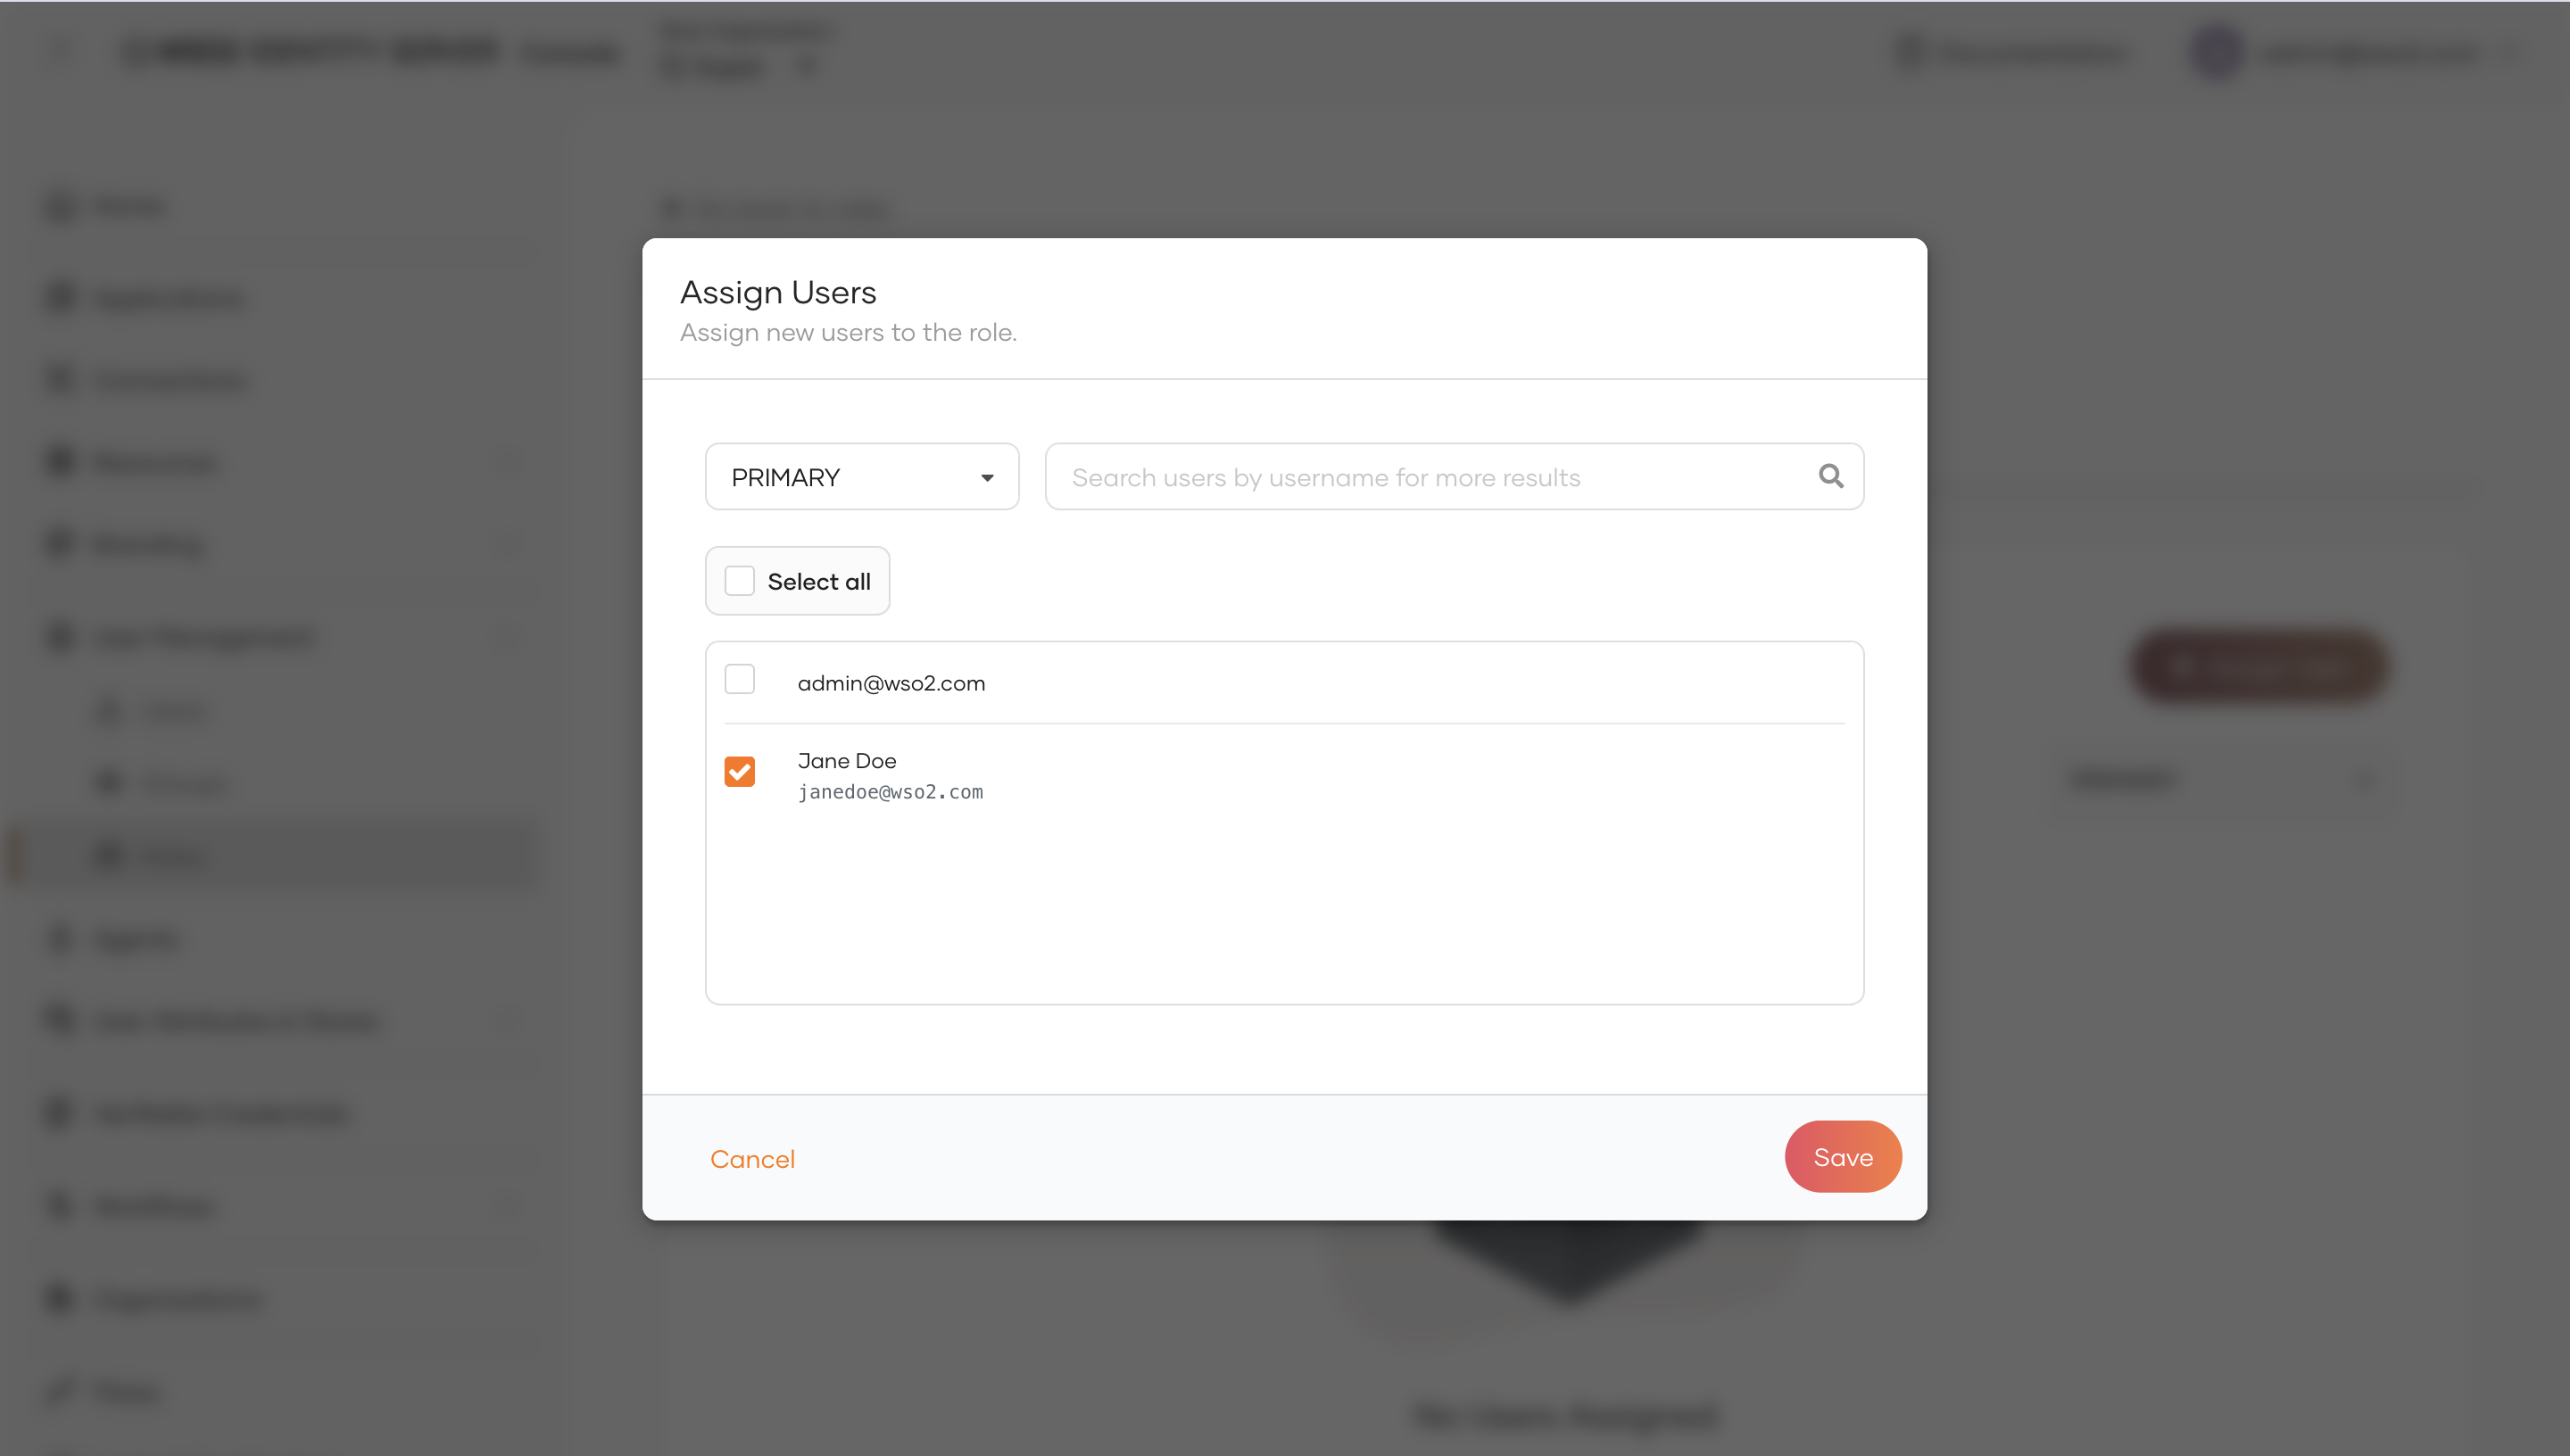
In the Assign Users dialog:
- Search for or locate the user (e.g.
janedoe@wso2.com). - Check the box next to the user's name.
- Click Save.
The user is now assigned to the role and can access the corresponding features in the Consent Portal and APIs.